Recipe
Gluten-Free Banana Bread Recipe: Moist Crumb, No Gummy Middle
This page contains affiliate links – if you buy through them we may earn a commission, at no extra cost to you. The recommendations are our own assessment. As an Amazon Associate we earn from qualifying purchases.
The short answer: gluten-free banana bread works with 350 g of very ripe mashed banana, 280 g of a gluten-free all-purpose blend that already contains xanthan gum, 115 g melted butter, 150 g brown sugar, 2 eggs and a spoonful of yogurt, baked in a lined 9x5-inch (23 x 13 cm) loaf tin at 175 °C / 350 °F for roughly 55–70 minutes. The one step most people skip is letting the mixed batter sit for about 30 minutes before it goes into the oven, which gives the rice flour and starches time to absorb liquid — that is the difference between a tender loaf and a damp, pasty centre. The full recipe with method is attached to this page, and the sections below explain the choices behind it so you can adapt it to the flour blend and dietary needs you actually have in your kitchen.
Gluten-Free Banana Bread
Ingredients
- 350 g very ripe banana, peeled and mashed (about 3 medium)
- 280 g gluten-free all-purpose flour blend containing xanthan gum
- 1 tsp baking soda
- 1 tsp baking powder
- 1 tsp ground cinnamon
- 1/2 tsp fine sea salt
- 115 g unsalted butter, melted and slightly cooled
- 150 g light brown sugar, packed
- 2 large eggs, at room temperature
- 60 g plain full-fat yogurt or sour cream
- 2 tsp vanilla extract
- 80 g chopped walnuts or dark chocolate chips (optional)
Instructions
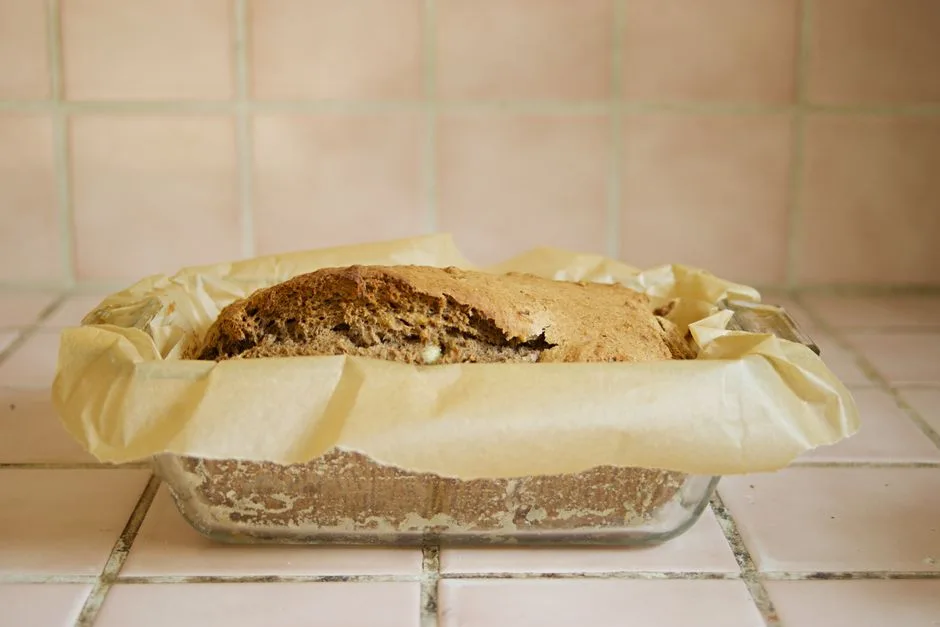
- Line a 9x5-inch (23 x 13 cm) loaf tin with parchment, leaving an overhang on the two long sides.
- Whisk the gluten-free flour blend, baking soda, baking powder, cinnamon and salt together in a bowl until evenly combined.
- Mash the peeled bananas with a fork to a rough puree with some small lumps remaining.
- In a large bowl, whisk the melted butter with the brown sugar, then whisk in the eggs one at a time, followed by the yogurt and vanilla.
- Stir the mashed banana into the wet mixture.
- Add the dry ingredients to the wet and fold until no dry streaks remain, then fold in the walnuts or chocolate chips if using.
- Cover the bowl and rest the batter at room temperature for 30 minutes while you heat the oven to 175 C / 350 F.
- Scrape the thickened batter gently into the lined tin and smooth the top.
- Bake for 55 to 70 minutes, tenting loosely with foil once the top is deep golden, until a skewer in the deepest part of the centre comes out with moist crumbs but no wet batter.
- Cool in the tin for 15 minutes, then lift the loaf out by the parchment onto a wire rack and cool completely before slicing.
Why Banana Bread Is an Easy Bake to Convert
Banana bread is a quick bread, not a yeasted one. It gets its lift from baking soda and baking powder reacting with acid and heat, not from a gluten network trapping gas over a long proof. That means removing wheat takes away far less of the structure than it would in a sourdough or a brioche, which is why banana bread is one of the more forgiving things to make gluten-free.
It also helps that the batter is heavy with banana, fat and sugar. All three interfere with gluten development even in a wheat version, so a good wheat banana bread and a good gluten-free one are aiming for a similar texture in the first place: dense, moist, close-crumbed and a little fudgy near the middle. In our editorial assessment, this is the category where a home baker is most likely to get a result that nobody at the table identifies as gluten-free.
The failure modes are specific and predictable. A gluten-free loaf is more likely to be gummy in the centre, to sink after it comes out of the oven, or to crumble when sliced warm. Each of those has a cause you can control, and they are covered in the sections below.
- Chemical leavening, not gluten, does the lifting — so the conversion is mostly about moisture management
- The batter is naturally rich, which masks the drier mouthfeel some gluten-free flours have
- The three usual problems — gummy centre, sunken top, crumbly slices — all trace back to hydration, doneness or cooling
Choosing a Gluten-Free Flour Blend
The simplest route is a commercial all-purpose gluten-free blend that already contains xanthan gum, used cup-for-cup or gram-for-gram in place of wheat flour. Read the ingredients panel before you buy: if xanthan or guar gum is not listed, you will want to add roughly 1/2 teaspoon per 280 g of flour for a loaf this size. Adding gum on top of a blend that already has it tends to produce a slightly rubbery, bouncy crumb.
Blends built on white rice flour with tapioca and potato starch behave most like the recipe assumes. Blends heavy in bean flour or sorghum bring a stronger flavour that competes with the banana, though the cinnamon and brown sugar cover a lot of it. Blends built around whole-grain brown rice flour drink up more liquid and benefit most from the resting step.
Single flours are a different project. Almond flour and oat flour both make perfectly good banana breads, but they are not one-for-one substitutes by weight for a starch-based blend, and swapping them into this recipe without adjusting the liquid and eggs will not give you the same loaf. If you use oats or oat flour, choose a product labelled gluten-free — plain oats are frequently handled alongside wheat, which matters if you are baking for someone with coeliac disease.
- Prefer a rice-and-starch based all-purpose blend labelled cup-for-cup or 1-to-1
- Check whether xanthan or guar gum is already in the blend before adding more
- Weigh the flour if you can — gluten-free blends vary a lot in how densely they scoop
- Use oats labelled gluten-free if you add oats, oat flour or rolled oats on top
Bananas: Ripeness, Quantity and How to Mash
Use bananas that are heavily speckled to almost fully black. As the fruit ripens, starch converts to sugar and the flesh softens, which gives you more flavour, more sweetness and more free liquid — all of which the recipe is counting on. Yellow, barely-ripe bananas make a bland loaf that also bakes up drier, because they are still holding their sugar as starch.
Weight matters more than the number of bananas, because banana size varies enormously. 350 g of peeled fruit is the target. Going well over that adds liquid the flour has to absorb and pushes you toward a gummy centre; going well under leaves the loaf dry and under-flavoured.
Mash by hand with a fork to a rough purée with some small lumps left in. A blender or food processor makes the banana too smooth and too liquid, which thins the batter. If your bananas are not ripe enough and you need them today, bake them in their skins at around 180 °C for 15–20 minutes until the skins blacken, then cool them completely before mashing — this softens and sweetens them, though it does not fully replicate a naturally ripened banana.
- Speckled to black skins; the softer the flesh, the better the loaf
- Weigh to 350 g peeled rather than counting bananas
- Fork-mash to keep small lumps — avoid blending to a smooth liquid
- Freeze over-ripe bananas peeled, then thaw and drain off nothing; the released liquid is part of the 350 g
Binders, Fat and the Moisture Balance
Without gluten, the structure has to come from somewhere else. In this recipe it comes from three places: the eggs, the gum in the flour blend, and the starch that gelatinises as the loaf bakes. Two large eggs give enough protein to hold the crumb together without making it eggy. Dropping to one egg produces a loaf that crumbles under the knife.
The yogurt or sour cream does two jobs. It adds acid, which reacts with the baking soda for lift, and its fat coats flour particles so the crumb stays tender. Buttermilk works in the same role if that is what you have.
Melted butter rather than creamed softened butter is deliberate. Creaming beats air into the fat and builds a lighter, more cake-like structure, which a gluten-free crumb struggles to hold up — the loaf rises tall and then sinks. Melted fat gives a denser, sturdier, more banana-bread-like result. Neutral oil works equally well for the texture and gives a slightly moister loaf, at the cost of some flavour.
- Two large eggs at room temperature; cold eggs can seize melted butter into lumps
- Yogurt, sour cream or buttermilk supplies both acid and fat
- Melt the butter rather than creaming it, to avoid a tall rise that collapses
- Brown sugar over white — its molasses content holds moisture and deepens the flavour
Rest the Batter Before It Goes Into the Oven
This is the single step that separates an acceptable gluten-free banana bread from a good one. Rice flour and starches hydrate more slowly than wheat flour. If the batter goes straight from bowl to tin, a portion of the flour is still dry when the crust sets, and it finishes absorbing liquid during baking and cooling — which reads on the tongue as grittiness or, worse, as a wet, pasty band through the middle of the loaf.
Cover the bowl and leave it at room temperature for about 30 minutes. The batter will visibly thicken. Do not stir it down aggressively afterwards; scrape it gently into the tin. Longer rests are possible, but the leavening starts working as soon as the acid meets the baking soda, so an hour or more begins to spend the lift before it reaches the heat.
If you are short on time, you can skip the rest — the loaf will still be edible. Expect a slightly damper centre and a marginally sandier texture, and check for doneness a few minutes later than you otherwise would.
- About 30 minutes, covered, at room temperature
- The batter should thicken noticeably; that is the flour absorbing liquid
- Do not knock the air out when transferring it to the tin
- Preheat the oven during the rest so the loaf goes into a fully heated oven
Baking, Doneness and Cooling
Line the tin with parchment on the long sides with an overhang, so you can lift the loaf out without inverting it — gluten-free loaves are fragile while warm and can break if you tip them onto a rack. Bake in the centre of the oven at 175 °C / 350 °F.
Doneness is judged by skewer, not by clock. A skewer pushed into the deepest part of the centre should come out with moist crumbs clinging to it but no wet, glossy batter. Because the crust browns before the centre sets, tent the loaf loosely with foil once the top is a deep golden brown and continue baking. Pulling it out at the first hint of colour is the most common route to a gummy middle.
Cool in the tin for about 15 minutes, then lift it onto a wire rack and let it cool completely before slicing. The starches continue to set as the loaf cools; cutting into a warm gluten-free loaf collapses the crumb and makes it seem underbaked even when it is not. If you want a warm slice, cool the loaf fully, cut it, then reheat the slice.
- Parchment sling on the long sides for lifting the warm loaf out intact
- Skewer test in the deepest centre point — moist crumbs yes, wet batter no
- Tent with foil if the top darkens before the middle is set
- Cool completely, then slice; this is not optional for a clean crumb
Storing, Freezing and Common Swaps
Gluten-free baked goods stale faster than wheat ones because the starches retrograde more quickly. Wrap the fully cooled loaf tightly and keep it at room temperature for a couple of days. Refrigeration accelerates staling and is worth avoiding unless your kitchen is very warm, in which case the fridge is the lesser problem.
Freezing is the better option for anything you will not eat quickly. Slice the cooled loaf first, layer the slices with parchment, and freeze in a sealed bag; individual slices toast straight from frozen. A whole frozen loaf takes hours to thaw and gets one chance at it.
For dairy-free, use a neutral oil or a dairy-free block in place of butter and a plain unsweetened plant yogurt in place of the dairy one. For egg-free, this particular recipe is harder to adapt — the eggs are load-bearing here, and flax eggs alone tend to leave the loaf dense and damp, so treat that as a different recipe rather than a substitution. Add-ins such as walnuts, pecans or dark chocolate chips can go in at up to about 80 g; toss them in a spoonful of the measured flour first so they do not sink to the bottom.
- Wrapped at room temperature for a couple of days; the fridge dries it out faster
- Freeze in slices with parchment between them for toasting on demand
- Dairy-free swaps are straightforward; egg-free needs a purpose-built recipe
- Toss nuts or chocolate in a little of the measured flour to keep them suspended
Frequently Asked Questions
Is banana bread naturally gluten-free?
No. Bananas, eggs, butter and sugar contain no gluten, but a standard banana bread recipe is built on wheat flour, which does. Making it gluten-free means replacing the flour and adjusting for the fact that gluten-free blends hydrate more slowly. Watch out for hidden sources too, such as oats without the gluten-free label, or baking powder that lists a wheat-based filler.
Do I need to add xanthan gum?
Only if your flour blend does not already contain it. Most cup-for-cup or 1-to-1 all-purpose blends include xanthan or guar gum, and adding more on top tends to make the crumb bouncy and slightly rubbery. If your blend has no gum listed, add about 1/2 teaspoon for the 280 g of flour in this recipe.
Why is my gluten-free banana bread gummy in the middle?
Usually one of three things: it came out of the oven before the centre was set, the batter had too much banana or other liquid for the amount of flour, or the flour never fully hydrated because the batter went straight into the tin. Resting the batter for 30 minutes, weighing the banana to 350 g, and judging doneness with a skewer rather than the clock address all three.
Can I make muffins from this batter?
Yes. Divide the rested batter between 12 lined muffin cups, filling each about three-quarters full, and bake at the same 175 C / 350 F. Muffins are done considerably sooner than a loaf, so start checking with a skewer at around the 20-minute mark and keep checking every few minutes after that. Let them cool in the tin for 10 minutes before moving them, since the crumb is fragile while hot.
How long does it keep?
Wrapped tightly at room temperature it is at its best for about two days, after which gluten-free crumb noticeably dries. The freezer is the better option: slice the fully cooled loaf, layer the slices with parchment, seal in a bag, and toast slices straight from frozen. Refrigerating the loaf tends to stale it faster than leaving it on the counter.
Related guides