Recipe
Gluten-Free Banana Bread Recipe (GF): A Moist Loaf That Holds Together
If you searched for a gluten-free banana bread recipe, here is the short version before the detail: use very ripe, heavily speckled bananas, a gluten-free all-purpose blend that contains xanthan gum (or add your own), enrich the batter with melted butter or oil plus a spoonful of yogurt, let the mixed batter rest for twenty to thirty minutes so the starches and flours hydrate, and bake in a lined loaf tin at 175 °C / 350 °F for roughly 55–65 minutes until a skewer comes out with a few moist crumbs rather than wet batter. The full ingredient list and method are in the recipe card on this page. Everything below explains why each of those choices matters, so you can adapt the loaf to the flour blend and the bananas you actually have in the kitchen rather than following the steps blind. This is our editorial guidance based on how gluten-free baking chemistry generally works — not a laboratory comparison, and not a ranked verdict on any particular flour.
Gluten-Free Banana Bread
Ingredients
- 3 large very ripe bananas (about 350 g peeled), mashed
- 200 g gluten-free all-purpose flour blend
- 1 tsp xanthan gum (omit if your flour blend already contains it)
- 1 tsp baking soda
- 0.5 tsp baking powder
- 0.5 tsp fine sea salt
- 1 tsp ground cinnamon
- 110 g unsalted butter, melted and slightly cooled (or 120 ml neutral oil)
- 150 g light brown sugar
- 2 large eggs, at room temperature
- 60 g plain yogurt or sour cream
- 1 tsp vanilla extract
- 80 g chopped walnuts or dark chocolate chunks (optional)
Instructions
- Heat the oven to 175 °C / 350 °F and line a 23 x 13 cm (9 x 5 inch) loaf tin with parchment, leaving an overhang on the two long sides.
- Whisk the flour blend, xanthan gum, baking soda, baking powder, salt and cinnamon together in a bowl until evenly combined.
- Mash the bananas in a separate large bowl until mostly smooth with a few small lumps remaining.
- Whisk the melted butter and brown sugar into the mashed bananas, then whisk in the eggs, yogurt and vanilla until the mixture is uniform.
- Fold the dry ingredients into the wet mixture with a spatula, stopping as soon as no dry streaks remain. Fold in the walnuts or chocolate now if using, first tossing them in a spoonful of the flour blend.
- Leave the batter to rest at room temperature for 20 to 30 minutes so the flours hydrate; it will thicken noticeably.
- Scrape the batter into the lined tin and smooth the top level.
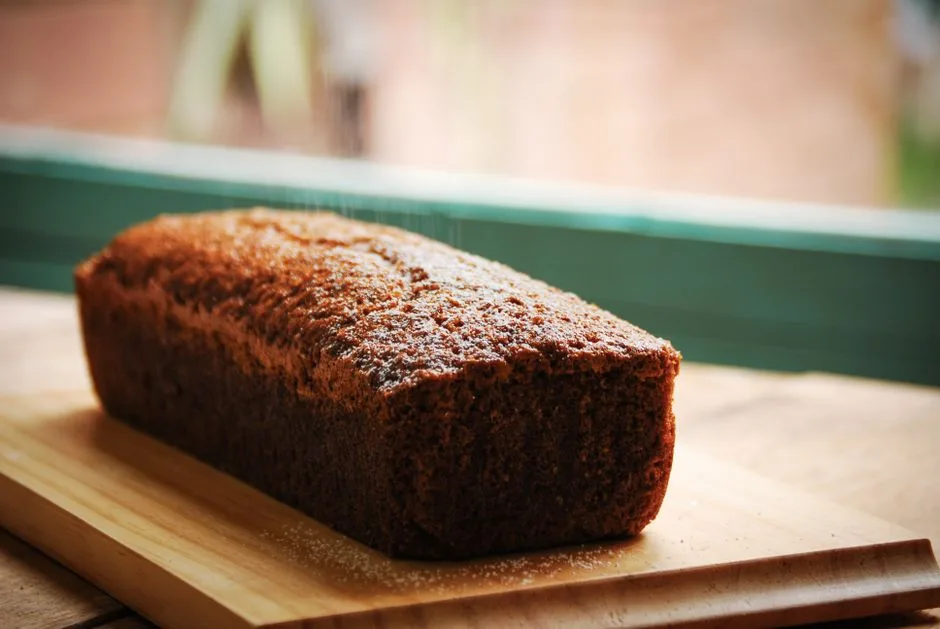
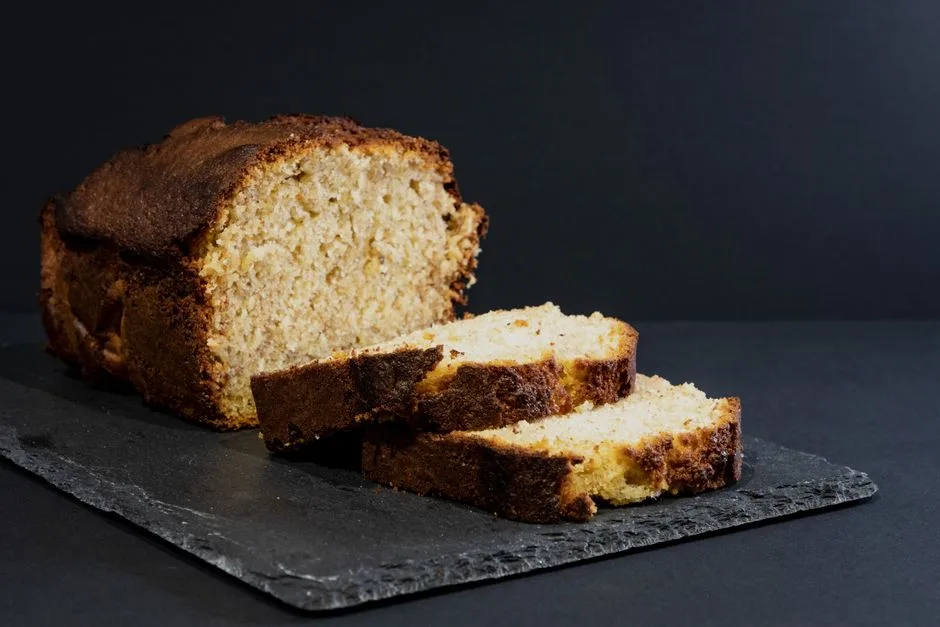
- Bake for 55 to 65 minutes, until the loaf is domed and deeply golden and a skewer inserted in the centre comes out with moist crumbs but no wet batter. Tent loosely with foil if the top darkens before the centre is set.
- Cool in the tin for 15 minutes, then lift the loaf out using the parchment overhang and transfer it to a wire rack.
- Let the loaf cool completely to room temperature before slicing.
Why gluten-free banana bread behaves differently
In a wheat loaf, gluten forms an elastic network that traps the gas released by baking soda and holds the crumb up while it sets. Take the gluten away and you are left with starches, a little protein from rice or sorghum, and whatever binder you add. That network has to be replaced by something, which is why gluten-free quick breads lean harder on eggs, fat, sugar and a hydrocolloid such as xanthan or psyllium.
Banana bread is unusually forgiving territory for this, because mashed banana is already doing much of the work. It contributes moisture, pectin, natural sugars that keep the crumb soft, and enough body that the batter does not collapse the moment it comes out of the oven. That is why banana bread is often the first thing that works properly when someone starts baking without gluten, and why it is worth getting right rather than treating it as a compromise version of the original.
The two failure modes to watch for are the opposite of each other. Too little structure and the loaf sinks in the middle as it cools; too much starch with too little hydration and the crumb turns dense and gummy, particularly along the centre line. Most of the technique advice further down exists to steer between those two.
- Banana provides moisture, sugar and pectin, all of which help hold a gluten-free crumb together
- Eggs and fat replace part of the structural job gluten normally does
- A sunken middle usually means underbaking or too much leavening; a gummy middle usually means underhydrated flour or too little bake time
Choosing the flour blend
A cup-for-cup gluten-free all-purpose blend is the sensible default here. These are typically built around white or brown rice flour with potato starch and tapioca starch, and many already include xanthan gum. Check the ingredient list on the bag before you add more: doubling up on xanthan is one of the quickest ways to turn a tender loaf into something faintly rubbery.
If your blend does not list a gum, add about a teaspoon for a standard loaf. If you prefer to avoid gums entirely, a tablespoon of whole psyllium husk stirred into the wet ingredients and left a few minutes to gel is a reasonable alternative, though it darkens the crumb slightly and gives a chewier bite.
Blends that are heavy on starch alone tend to bake pale and slightly hollow. If yours is starch-forward, swapping a modest portion for a whole-grain gluten-free flour — sorghum, oat, buckwheat or teff — gives more flavour and a sturdier crumb. Sorghum and oat are the mildest and suit banana well; buckwheat and teff are assertive and will read as deliberately earthy. Almond flour can replace a portion too, adding richness and moisture, but it is not a one-for-one substitute by volume and will make the loaf denser.
Whatever you use, weigh it if you can. Gluten-free flours vary enormously in how much they compress in a measuring cup, and a heavy-handed scoop is a common cause of a dry, crumbly loaf.
- Check whether your blend already contains xanthan gum before adding more
- Sorghum or oat flour in place of part of the blend adds flavour and structure
- If you use oat flour, choose one labelled gluten-free — oats are frequently handled alongside wheat
- Weighing flour is more reliable than measuring by volume in gluten-free baking
The bananas: ripeness is the main variable
Yellow bananas with a few brown flecks are edible but underpowered for baking. What you want is fruit that is deeply speckled to mostly black, soft enough to mash with a fork without effort, and smelling sweet rather than green. As bananas ripen, starch converts to sugar, so the riper the fruit the sweeter the loaf and the softer the crumb — which matters more in a gluten-free bake, where you are relying on sugar and moisture to keep things tender.
If your bananas are not there yet, you can push them along by roasting them in their skins in a moderate oven until the peels blacken and the flesh loosens, then cooling them before use. This does not produce quite the same flavour as natural ripening, but it is a workable rescue. Freezing and thawing also softens bananas considerably; drain off some of the liquid that pools, or the batter will be too wet.
Mash to a mostly smooth purée with a few small lumps left in. Completely liquid banana makes for a slightly slick, pudding-like crumb; leaving some texture gives pockets of concentrated banana flavour through the slice.
- Heavily speckled or blackened skins are the target, not merely ripe yellow
- Thawed frozen bananas work well — drain excess liquid first
- Mash to mostly smooth with a few lumps, not to a pourable liquid
Method notes that decide the texture
Rest the batter. This is the single step people skip most often, and in gluten-free baking it does real work. Rice flour in particular takes time to absorb liquid; a batter that goes straight into the tin often bakes up with a faintly sandy or gritty mouthfeel that disappears entirely if you give it twenty to thirty minutes on the counter first. The batter will thicken visibly during the rest — that is expected, not a sign that something has gone wrong.
Do not beat air into it aggressively. There is no gluten to overdevelop, but a batter whipped hard rises fast and then falls, leaving a dip and a compressed band in the middle. Mix the wet ingredients thoroughly, then fold the dry ingredients in only until no floury streaks remain.
Line the tin properly. A parchment sling up the two long sides lets you lift the loaf out without wrestling it, which matters because a warm gluten-free loaf is more fragile than a wheat one.
Bake longer than you think, then cool completely. Gluten-free batters hold more moisture and the centre needs time to set. A skewer should come out with moist crumbs clinging, not wet batter. If the top is browning well before the centre is done, tent it loosely with foil. Then leave it alone: cool in the tin briefly, transfer to a rack, and let it come fully to room temperature before slicing. Cutting a hot gluten-free loaf drags the still-setting starches and is the most reliable way to convince yourself the recipe failed when it did not.
- Rest the mixed batter 20–30 minutes so the flours hydrate
- Fold, do not whip — overaerated batter sinks
- Use a parchment sling for a clean lift-out
- Tent with foil if the crust darkens before the centre is set
- Cool completely before the first slice
Swaps, add-ins and dietary variations
Dairy-free: replace the butter with a neutral oil or melted refined coconut oil, and the yogurt with a plain unsweetened plant yogurt or an equal amount of unsweetened plant milk with a squeeze of lemon juice stirred in. The loaf stays reliably moist; you lose a little of the buttery note, which most people do not miss under the banana.
Egg-free: this is the harder swap, because eggs are carrying structure. Flax eggs (ground flaxseed whisked with water and left to gel) work reasonably well here since banana provides supporting body, but expect a denser, slightly stickier crumb and a longer bake. Do not attempt egg-free and gum-free at the same time.
Sugar: brown sugar suits banana bread because the molasses reinforces the caramel notes, and it holds moisture better than white sugar. You can reduce the sugar somewhat, but not drastically — in gluten-free baking, sugar contributes tenderness and shelf life, not just sweetness, and a heavily reduced loaf firms up quickly.
Add-ins: chopped walnuts or pecans, dark chocolate chunks, a handful of desiccated coconut, or a spoonful of ground cinnamon and cardamom all sit well against banana. Toss dry add-ins in a spoonful of the flour blend before folding them in so they do not all sink. Check that chocolate and any spice blends are labelled gluten-free if you are baking for someone with coeliac disease.
- Oil plus plant yogurt makes a straightforward dairy-free version
- Flax eggs work but give a denser, stickier crumb and need longer in the oven
- Keep most of the sugar — it is doing structural and keeping work
- Coat nuts and chocolate in a little flour blend so they stay suspended
Storing, freezing and troubleshooting
Gluten-free loaves stale faster than wheat ones because the starches retrograde more readily. Once fully cool, wrap the loaf tightly or store it in an airtight container at room temperature for a couple of days. The refrigerator dries it out and is best avoided unless your kitchen is very warm. For anything longer, slice the loaf first, wrap the slices, and freeze — you can then toast a slice straight from frozen, which restores the crumb better than thawing on the counter does.
Gummy or dense band along the centre: usually underbaked, or the batter went into the oven without resting. Give it more time next round, and check that your oven is actually reaching temperature — an oven thermometer settles this quickly.
Sunken middle: often too much baking soda or baking powder, an overmixed batter, or the oven door opened early. Measure the leavening carefully and leave the door shut for at least the first two-thirds of the bake.
Crumbly, dry slices: typically too much flour, most often from scooping rather than weighing, or a blend with no binder. Weigh the flour and confirm there is xanthan or psyllium in play.
Pale, hollow crumb: a very starch-heavy blend. Swap part of it for sorghum, oat or buckwheat flour and the loaf will bake up with more colour and body.
- Store airtight at room temperature; refrigeration accelerates drying
- Freeze in slices and toast from frozen
- Gummy centre → bake longer and rest the batter
- Crumbly loaf → weigh the flour and check for a binder
Frequently Asked Questions
Can I use a cup-for-cup gluten-free flour blend straight from the bag?
Yes — a gluten-free all-purpose blend designed as a one-to-one replacement is the simplest route for this loaf. The one thing to check first is whether the blend already contains xanthan gum. If it does, leave out the added teaspoon in the ingredient list, because doubling the gum gives the crumb a rubbery, slightly bouncy quality. Weigh the flour rather than scooping it, since blends differ a great deal in how densely they pack.
Do I actually need xanthan gum?
Not absolutely, but you need something doing that job. Banana provides more binding than most fruit, so this loaf tolerates a gum-free approach better than, say, a gluten-free sandwich bread would. If you want to skip xanthan, whisk about a tablespoon of whole psyllium husk into the wet ingredients and give it a few minutes to gel before combining. Expect a slightly darker, chewier crumb. Going without any binder at all tends to produce a loaf that crumbles when sliced.
Why is my gluten-free banana bread gummy in the middle?
Almost always one of three things. It came out of the oven too early — gluten-free batters hold more moisture and need a longer bake than the wheat version. The batter was not rested, so the flours went into the oven still absorbing liquid. Or it was sliced while warm, which drags the starches before they have finished setting. Bake until a skewer shows moist crumbs rather than batter, rest the mixed batter twenty to thirty minutes, and let the loaf cool completely before cutting.
How ripe do the bananas need to be?
Heavily speckled to mostly black, and soft enough to mash with a fork with no resistance. Ripening converts starch to sugar, which means riper bananas give a sweeter, more tender loaf — worth more in gluten-free baking, where sugar and moisture are helping to hold the crumb together. Bananas that were frozen and thawed work well; drain off the liquid that separates out so the batter is not too loose.
Is this suitable for someone with coeliac disease?
The recipe contains no gluten-containing ingredients, but suitability depends on the specific products you buy. Check that the flour blend, baking powder, vanilla extract, any oat flour, and add-ins such as chocolate chunks or spice mixes are labelled gluten-free, since several of these are commonly produced or handled alongside wheat. Use clean equipment and a clean work surface if you also bake with wheat flour in the same kitchen. If you are baking for someone with a diagnosed condition, follow the guidance they have from their own healthcare provider.
Related guides